The 2008 Oyster/Adams Auction
|
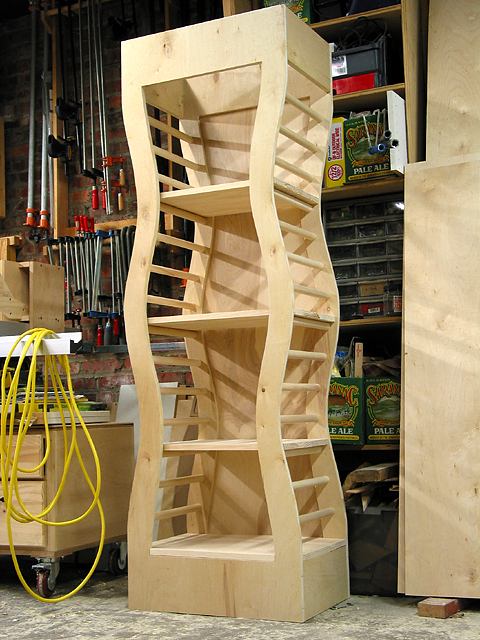
Unit 1 dry fit. [right] Some of the design considerations: The "face frame" and back are jig-sawed from 3/4 inch plywood. I first made a template from 1/4 plywood - the template was one half of a full elevation, so I could flip it for perfect symmetry along a vertical axis. I laid out the curves using a long strip of 3/4" maple that I ripped to about a 1/4 inch thickness so it would be flexible. Then I just bent it by eye and held it in place with a few strategically place finish nails. The face frame and back are joined to the short side pieces (at the top and bottom) using Beadlock floating tenons. I give the Beadlock device a B grade - there are some definite drawbacks, and I am planning to write a review at some future date. But for my purposes it did save considerable time over cutting 64 mortices by hand. To be honest, however, I think biscuts would have worked just fine. The doweling is cut from 1" dowel stock picked up at home depot. (That stuff is crap, by the way. I estimate that 25% of it is is either under or over sized and hence unusable assuming you actually need 1" stock. But I guess that is expecting too much.) I drilled the holes on my drillpress with a 1 inch forstner bit, with lot of help from Karen to support and feed the workpiece. 14 rungs/side x 2 holes per rung (front and rear) x 2 sides x 2 units. That's 112 holes! I also built a little jig for my router table so I could chamfer the ends of the dowels, which made them a lot easier to align during glue-up. And glue-up was a great deal of fun. Karen helped again. We dry fit each unit first, then came the real thing. First, brush glue in 28 holes and glue in the dowels, plus eight mortices and eight Beadlock tenons. Then...quickly!...brush glue in all the holes and mortices of the face frame, flip and frantically align with the dowels. Pound with couple of rubber mallets, apply every long clamp in the shop, square up the carcase, and take a deep breath. |
|
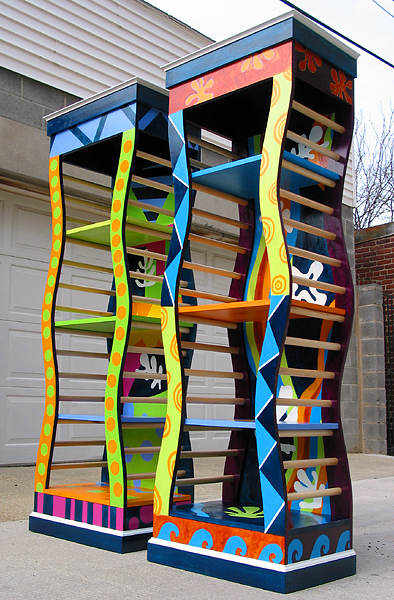
The fleet is ready to sail! [left] As is readily apparent, Serena has a real flair for design and does a great job of organizing the kids. The kids really rise to the occasion too! This year, the finish consisted of acrylic artists paint. Serena had originally wanted a clear acrylic spray finish applied over the artwork, but I thought the initial results looked awfully dodgey, so I ended by simply brushing on a coat of water based poly finish, which turned out nicely (at least I think so!). |
|
|